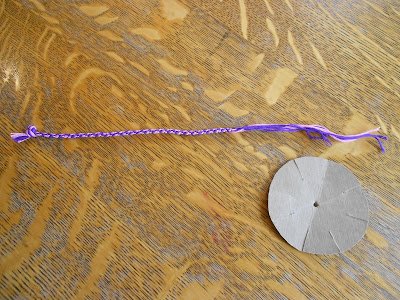
We finally figured out how to braid beautiful friendship bracelets!
I have to admit to having missed Bracelet Braiding 101 in my childhood, thanks to the short lived, but much simpler, friendship pin fad of the 80s. Anyone else remember those tiny, bead laden, safety pins on stuck to their shoe laces?
My girls were less than impressed with my beading ability. They wanted bracelets - which I failed miserably at figuring out, even with the help of a Klutz kit. But, that was before we discovered the braiding disk template from Homemade Gifts Made Easy, which some kind soul linked on Pinterest.
It's so simple, just trace and cut a drinking glass sized circle from thin cardboard. Cut eight equally spaced slits about an inch long, in from the edges, and punch a hole, with a sharp pencil, or nail, in the center.

Then, cut seven lengths of embroidery floss, or thin yarn, about a foot and a half long.

Tie them together with a knot at one end.

Lace the knot through the hole in the center of the disk...

...pulling it snug against the disk, underneath.

Fan the strands of floss out, on the other side of the disk, and hook them into seven of the slits, leaving the eighth slit, at the top, empty.

The disk and floss should look something like a jelly fish at this point.

Start braiding, by removing the bottom right strand from the slit...

And hooking it into the top slit.

Turn the disk so the empty slit is at the top again.

Repeat the last three steps - unhook the bottom right strand, hook it into the top slit, turn the disk so the empty slit is at the top. As you go, you will notice the top strands beginning to twist over each other...

...and a complicated braid coming out the hole underneath.

When the braid is long enough to make a bracelet, simply unhook the strands from all of the slits, and pull the braid free from the disk.

Tie two knots, one right at the end of the braiding, and one slightly further down in the loose strands (shown with black arrows, below). Then, you can fasten the braid on your friend's wrist, by sticking the knot from the beginning end (shown with a white arrow), in the space between the second two knots.

Trim the loose ends, and you're done.

Homemade Gifts Made Easy also has a printable pattern for a more complicated disk, with step-by-step instructions on how to make bracelets with more intricate, flower, heart, diamond, chevron, rainbow, or striped and dotted patterns. That's lucky for us, since we're looking at a rainy weekend.
It's great to be a homeschooler.


5 comments:
I loved friendship pins! I remember making bracelets too, but I'm not sure that I could remember how at this point. The disk is pretty cool!
Whoa - this is complicated enough already, but looks good. If Anna ever wants to participate in this fad, she has to go to papa and figure out the instructions.
Great tutorial!
Making friendship bracelets was one of my daughter's favorite activities as a tween. Thanks for sharing the great tutorial! I featured your post at the Living Montessori Now Facebook page at http://www.facebook.com/LivingMontessoriNow
I remember both of those! I remember making a friendship bracelet in Girl's Club (our church's variation on Awana/Girl Scouts).
This kind of reminds me of a french knitting loom.
Post a Comment